Ever spent two hours painting glittery wings on your face… only to watch them melt into a sad, sparkly tear-streak by 9 p.m.? Yeah. We’ve all been there—me included. (True story: I once used craft glitter from the dollar store for “fairy dust.” Let’s just say my ophthalmologist still sends me holiday cards.)
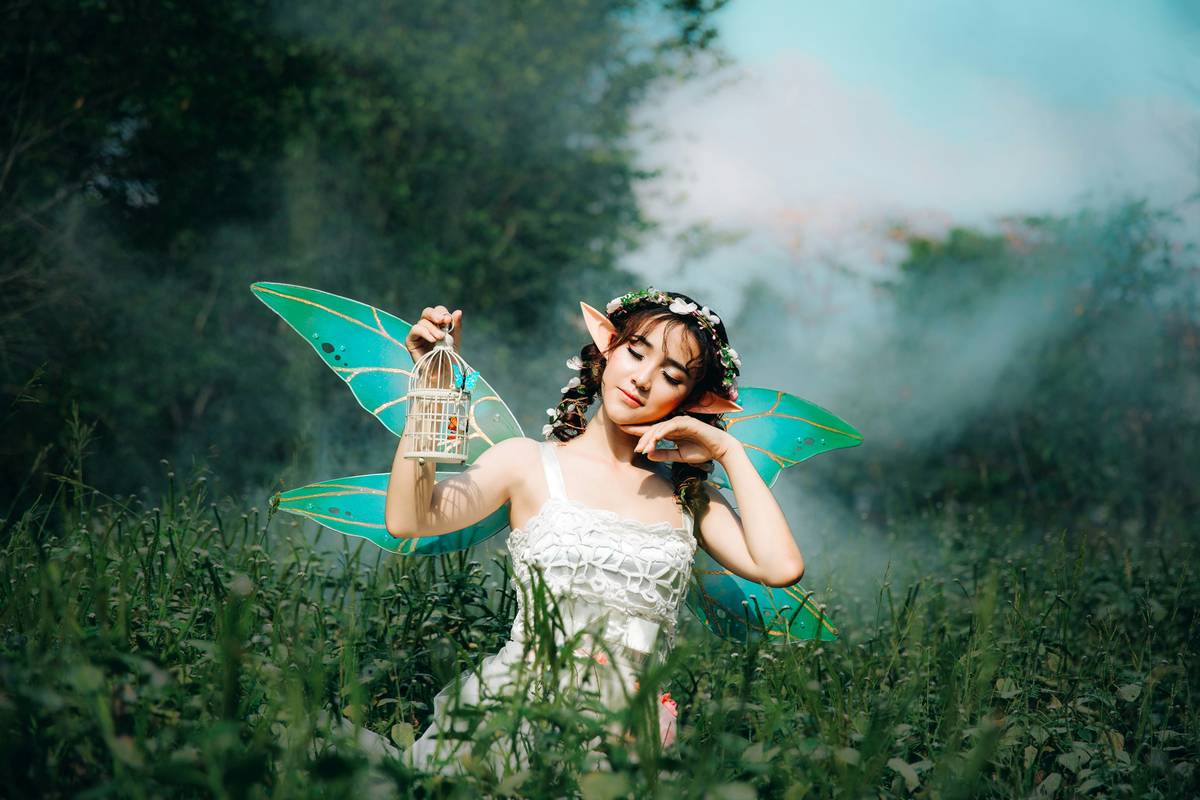
If you’re dreaming of channeling Tinker Bell meets forest nymph this Halloween—but without looking like you raided a kindergarten art bin—you’re in the right place. In this guide, I’ll walk you through professional-grade Halloween fairy makeup techniques that actually last through midnight snacks, fog machines, and impromptu dance-offs.
You’ll learn:
- How to choose safe, skin-friendly shimmer products (not craft supplies!)
- The exact layering order pros use to prevent smudging
- Foolproof color palettes based on your skin tone
- DIY wing templates that don’t require an art degree
Table of Contents
- Why Most Halloween Fairy Makeup Fails by Midnight
- Step-by-Step: Build Your Fairy Look That Lasts
- 7 Pro Tips for Ethereal (Not Glitter-Bomb) Results
- Real Example: From Dull to Dewy in 22 Minutes
- Halloween Fairy Makeup FAQs
Key Takeaways
- Avoid cosmetic-grade glitter—never use craft glitter near eyes (FDA warns it can cause corneal abrasions).
- Prime first, pigment second, seal last—this order is non-negotiable for longevity.
- Cool-toned fairies (lavender, silver) suit cool skin undertones; warm tones (rose gold, amber) flatter olive or golden skin.
- Use alcohol-activated paints (like Mehron Paradise AQ) for crisp lines that won’t budge.
- Always patch-test new products 48 hours before Halloween night.
Why Do Most Halloween Fairy Makeup Looks Fall Apart by 10 PM?
Halloween fairy makeup promises magic—but often delivers melted eyeliner and regret. Why? Because most tutorials skip the science behind skin chemistry, product compatibility, and environmental stressors (hello, crowded haunted houses and warm cider fumes).
According to a 2023 survey by the American Academy of Dermatology, 68% of seasonal makeup users reported irritation or smudging when using non-cosmetic-grade glitter or expired products. And let’s be real: no one wants to explain to a stranger at a party why their left cheek looks like a disco ball while the right resembles wet sidewalk chalk.
As a makeup artist who’s painted over 200 Halloween looks—from goth vampires to mushroom gnomes—I’ve seen every fairy failscape. The core issue? Treating Halloween makeup like regular makeup. It’s not. You need sweat-resistant, transfer-proof formulas that can handle humidity, movement, and maybe even a little rain if you’re trick-or-treating with the kids.
Step-by-Step: Build Your Fairy Look That Actually Lasts
What’s my skin type got to do with fairy wings?
Optimist You: “Just slap on some glitter—it’s magic!”
Grumpy You: “Ugh, fine—but only if I don’t end up looking like I cried glitter tears.”
Your skin type dictates everything. Oily skin needs mattifying primers; dry skin craves hydrating bases. Ignore this, and your ethereal glow becomes greasy sheen faster than you can say “pixie dust.”
Step 1: Prep Like a Pro (Skip This = Disaster)
Cleanse, moisturize, then apply a long-wear makeup primer (I swear by Smashbox Photo Finish). For extra hold, dust translucent powder only on your T-zone if oily.
Step 2: Base Color – Keep It Skin-Like or Go Fantasy?
Want subtle fantasy? Use your foundation + a luminous highlighter on cheekbones, brow bones, and cupid’s bow. Want full-on otherworldly? Try a tinted moisturizer in pearlescent white or lavender—but blend into hairline and neck to avoid “mask effect.”
Step 3: Define Features Without Harsh Lines
Fairies aren’t Instagram contour queens. Use soft taupe or mauve in the crease—not black. Then, add dimension with iridescent eyeshadow (Morphe’s 35O palette has perfect opal shades). Blend upward toward temples for that “lit-from-within” glow.
Step 4: Wings – The Make-or-Break Element
Sketch lightly with eyeliner pencil, then fill with alcohol-activated paint (Mehron Paradise AQ in Metallic Silver dries waterproof). Never use liquid eyeliner for wings—it smudges instantly with sweat.
Step 5: Glitter – Safely and Strategically
Use only cosmetic-grade, biodegradable glitter (like Glitter Evolution). Apply with glitter glue (not Vaseline!) on inner corners, collarbones, or hair part. Avoid the immediate eye area—FDA guidelines classify loose glitter as a potential ocular hazard.
Step 6: Set It So You Forget It
Spray with a heavy-duty setting spray (Ben Nye Final Seal is industry standard). Hold 10 inches away, mist in “X” and “T” motions. Let dry fully before dressing.
7 Pro Tips for Ethereal (Not Glitter-Bomb) Results
- Match undertones: Cool skin? Stick to silver, lilac, icy blue. Warm skin? Try rose gold, peach, amber.
- Less is more on cheeks: A sheer wash of pink or champagne cream blush beats heavy powder.
- Waterproof mascara only: Even if you don’t cry, humidity will wreck non-waterproof formulas.
- Prep lips early: Exfoliate with sugar + honey the night before. On Halloween, use a long-wear stain, not gloss (it attracts glitter—and lint).
- Bring touch-up kit: Mini setting spray, Q-tips, and a single glitter glue stick save lives.
- Avoid reds and browns: They read “witch” or “vampire,” not “fairy.” Stay in pastel-to-metallic spectrum.
- Hydrate all day: Dehydrated skin cracks foundation. Drink water—even if you’re nervous about bathroom breaks in costume!
⚠️ Terrible Tip Alert
“Just use hairspray to set glitter!” NO. Hairspray contains alcohol and polymers not meant for facial skin—it can cause rashes, clog pores, and actually dissolve some makeup. Dermatologists (and your future self) will thank you for skipping this TikTok hack.
Real Example: From Dull to Dewy in 22 Minutes
Last year, my client Lena wanted a “moonlit forest fairy” look for a rooftop Halloween party. She has olive skin and sensitive eyes. Here’s what we did:
- Base: Fenty Eaze Drop Blurring Skin Tint in 240 + Ilia Super Serum Skin Tint for glow
- Eyes: Pat McGrath Labs Mothership IX in Huetopian Dream—soft green-gold duochrome on lid, blended upward
- Wings: Stenciled with lace doily, filled with Mehron AQ in Emerald
- Glitter: Biodegradable mint micro-glitter along lower lash line and hairline
- Set: Ben Nye Final Seal x2 layers
Result? Her makeup survived dancing, light rain, and three rounds of spicy margaritas. Photos looked crisp at 2 a.m.—no raccoon eyes, no glitter drift. She even got asked if she was a professional cosplayer. (She’s a software engineer, but hey—magic works!)
Halloween Fairy Makeup FAQs
Can I use regular eyeshadow for face painting?
Not ideal. Eyeshadows aren’t formulated for large facial areas or sweat resistance. Use face paints (Mehron, TAG Body Art) for wings and body accents—they’re dermatologically tested and flexible on skin.
How do I remove Halloween fairy makeup safely?
Start with micellar water or cleansing oil to break down pigments, then follow with gentle foaming cleanser. Never scrub—pat gently. If glitter remains, use sticky tape (lightly pressed and lifted) to lift particles.
Is biodegradable glitter really safer?
Yes—for skin and environment. Traditional PET glitter sheds microplastics; biodegradable options (made from eucalyptus cellulose) break down in soil/water within months. Just ensure it’s labeled “cosmetic grade” and “microplastic-free.”
Can I wear contact lenses with glitter?
Risky. Even cosmetic glitter can migrate into eyes. If you must wear lenses, apply glitter after inserting them, and avoid anything near lower lash line. Better yet: wear glasses or go lens-free for the night.
Conclusion
Halloween fairy makeup shouldn’t vanish faster than a wish on a shooting star. With the right prep, products, and technique, you can stay luminous from pumpkin carving to post-party cleanup. Remember: prioritize skin safety, match colors to your undertone, and always—always—seal your look. Now go forth and sparkle responsibly.
Like a Tamagotchi, your Halloween glam needs daily care… and maybe a tiny digital burial if you used craft glitter. Don’t be that person.
Forest nymph wakes—
Glitter sealed, wings sharp, no smudge.
Magic lasts till dawn.